[Chapter 3] Remote Login
3.1 Remote Login to VPS (PuTTY)
First, given that Windows has the largest user base among beginners, this article will use Windows as an example.
Secondly, although modern Windows 10 and later versions feature PowerShell and WSL which offer a great SSH experience, not all versions of Windows have the latest components. Therefore, we will use the classic tool PuTTY for this detailed SSH tutorial. (If you use other tools, the operations after logging in are identical.)
Now, follow me step by step.
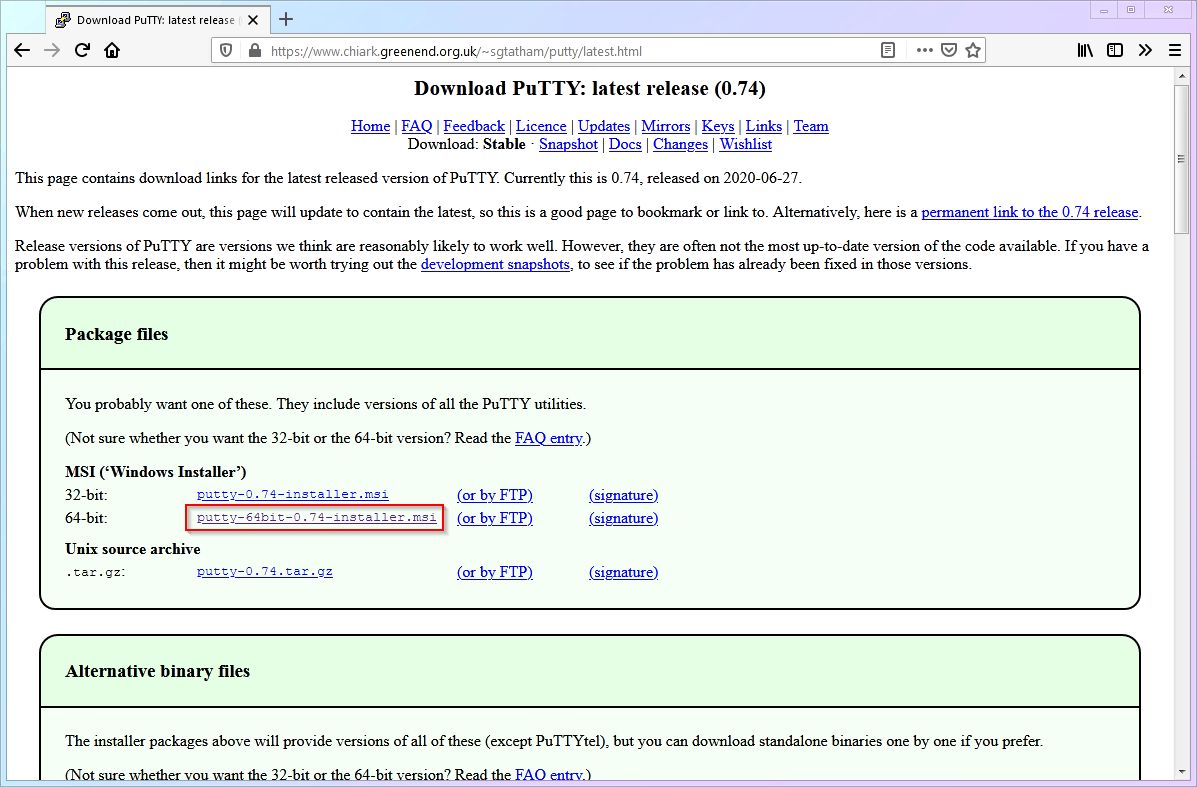
Go to PuTTY's official website and download the version suitable for your operating system (this article uses the 64-bit version).
After installation, open PuTTY. Now, take out the notebook where you jotted things down in the previous chapter. Fill in your VPS IP Address and Port in the corresponding fields shown below. To avoid typing this every time, we can save the session. Just click
Saveunder Saved Sessions, and in the future, clickLoadto restore settings instantly.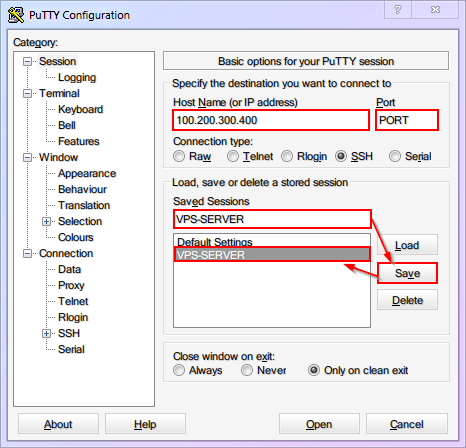
I suggest setting
Seconds between keepalivesunderConnectionto60. This prevents SSH from automatically disconnecting due to inactivity. Make sure to save your session settings again.
Note
Any setting updates in PuTTY must be manually saved to the Session again, otherwise, they will be lost when you close the program.
Click
Opento enter the SSH connection window. Enter your username and password as shown below to connect to your VPS. (This article assumes the default username isroot. Also, when typing passwords in Linux, **no asterisks\*\*\*\***will appear**. This prevents password length leakage—your keyboard isn't broken!)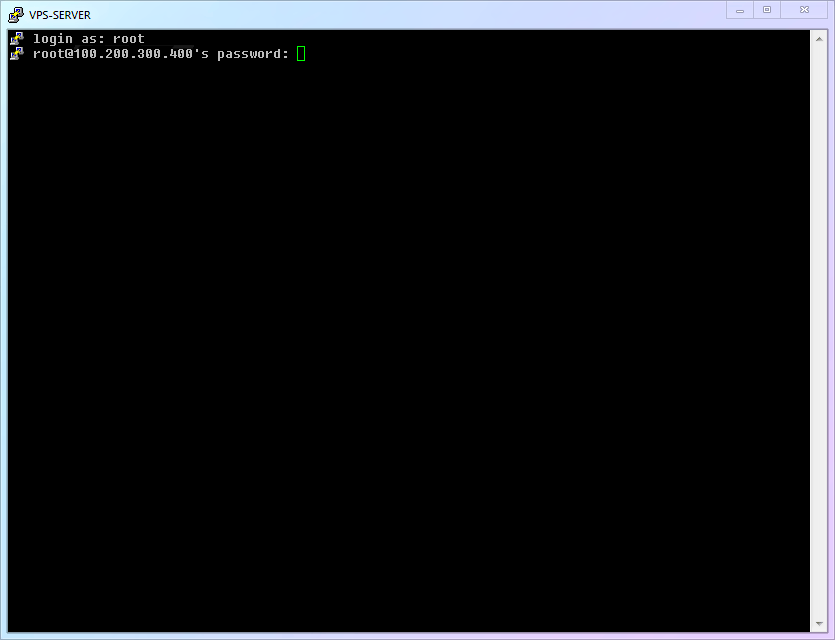
3.2 Successfully Logged into SSH! Meet the Command Line Interface
If you entered everything correctly, you will see a screen similar to the one below, indicating a successful login:
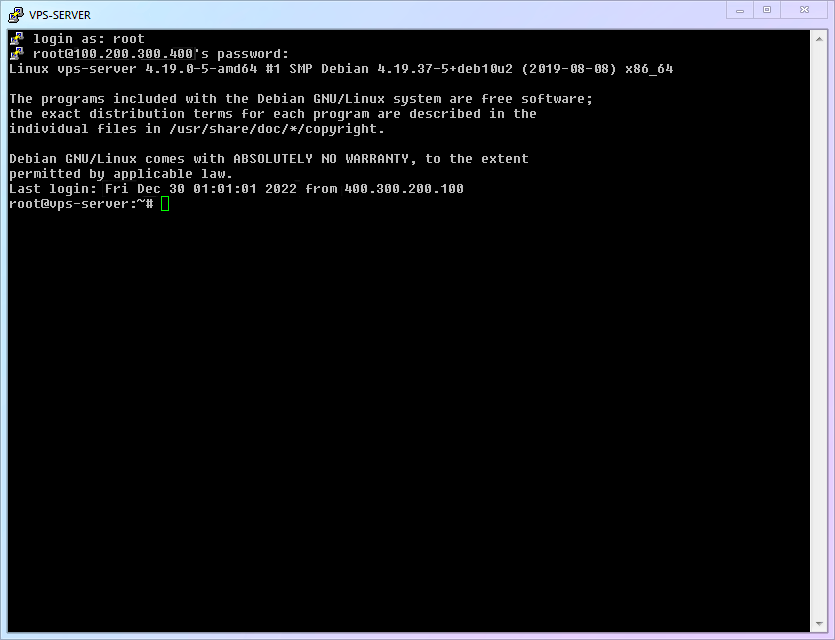
This interface is the remote server's [Desktop], but without the icons, mouse, or colorful graphics you are used to. It's just simple text. This is the Command Line Interface (CLI).
All subsequent operations require you to work in this interface, just like a hacker in the movies. It might feel strange, but trust me, the command line is neither scary nor mysterious. Ultimately, it just turns your mouse clicks into text commands: You say it, it does it.
Now, look around and get familiar with the CLI environment. This interface actually tells you some useful info, like the system kernel version (e.g.,
4.19.37-5in the image), last login time, and IP. Of course, depending on your VPS, what you see might differ slightly.Pay attention to the last line, to the left of the flashing cursor. There is a string of characters. In the image, it shows
root@vps-server:~#. How should you understand this? Simple:- The current user is
root - The server
rootis on isvps-server - The folder
rootis currently in is~ - The
#indicates where you can type commands
The first two are intuitive. The third is about the Linux file system; for now, just know that "
~" is the [Current User's Home Base]. The fourth, the prompt#, doesn't need much thought. Just know that in future articles, commands you need to type will start with#or$, indicating where you start typing. (So when copying commands, only copy the content after this symbol, do not copy the prompt itself.)- The current user is
3.3 Updating Linux Software for the First Time
Just like your phone (Android or iPhone) checks the App Store for updates (security patches and new features), Linux has a very similar update logic. If you can update apps on your phone, you can update Linux software!
In Linux, every app is called a "package". The program that manages apps is naturally called the "Package Manager". You can install, update, and uninstall software, or even update the Linux system itself through it. The package manager is powerful, but for now, you only need to know that the Debian system's manager is called
apt. Next, let's useaptto perform a full software update to get familiar with it.Basic Linux commands for beginners:
Code Command Name Description cmd-01apt updateCheck for software updates cmd-02apt upgradeExecute software updates Now enter the first command to fetch update information:
shellapt updateThen enter the second command. When asked whether to continue
(Y/n), typeyand hit Enter to start the installation:shellapt upgradeThe complete process is demonstrated below:

3.4 Your Progress
Congratulations on taking another solid step! Now, you can log in to your remote server via SSH! After logging in and updating software, what should you do next? Head to the next chapter to find out!
⬛⬛⬛⬜⬜⬜⬜⬜ 37.5%
